Bot Setup Tutorial
Create an application
Create an application in the Discord Developer Portal. The name and avatar you set here will be the name and avatar of your bot. You do not need to create a “Bot user” like you would with a traditional Discord bot.
Authorize the application
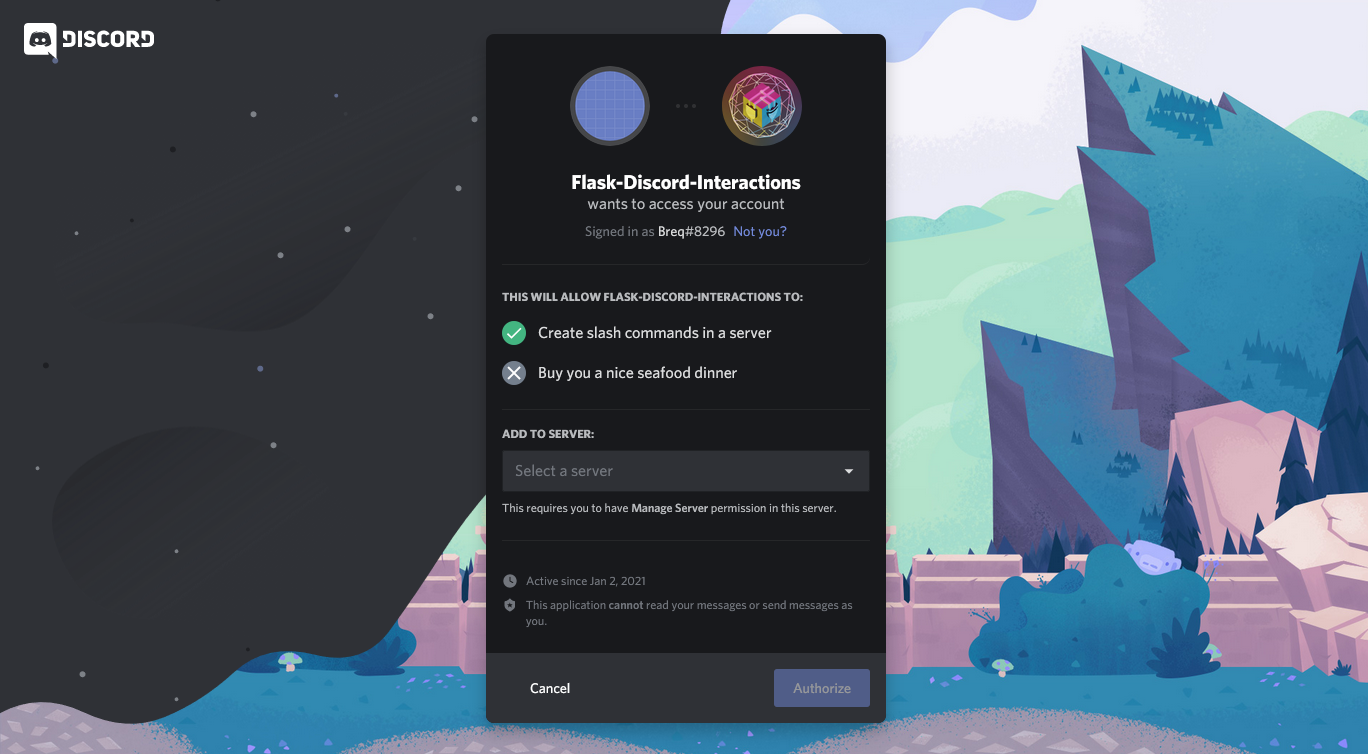
Authorize the application to create application commands in one of your servers. In the Developer Portal, go to the OAuth2 tab, click the “applications.commands” checkbox, and copy the URL. (You don’t need the “bot” scope–that one is for traditional WebSocket-based Discord bots.)

Go to this URL, and you’ll be prompted to select a server and click “Authorize”. Select the testing server you want to add your bot to. (You can always go back and add more servers later.)
Set your environment variables
The library requires your client ID, public key (to authenticate incoming requests), and client secret (to register new commands). You can find all three in the “General Information” section of the Developer Portal. Store them in the DISCORD_CLIENT_ID, DISCORD_PUBLIC_KEY, and DISCORD_CLIENT_SECRET environment variables.
If you’re new to environment variables, Twilio has a nice guide. For deploying on Heroku/Dokku/etc, refer to their documentation on how to set environment variables.
export DISCORD_CLIENT_ID=795079214377730068
export DISCORD_PUBLIC_KEY=4ed566bf47318ee9482be3e11669d715520350b9f68672f339eee2f31a6822e1
export DISCORD_CLIENT_SECRET=[your secret here]
The example also uses the environment variable TESTING_GUILD to store the ID of the server you want to add commands to. Discord has an article about how to find the server ID using developer mode.
export TESTING_GUILD=197777408198180864
Run the program
You should be able to run a program without any errors now. It should register slash commands in your server. However, these slash commands will not work yet.
Here’s a quick “hello world” program:
import os

from flask import Flask
from flask_discord_interactions import DiscordInteractions


app = Flask(__name__)
discord = DiscordInteractions(app)


app.config["DISCORD_CLIENT_ID"] = os.environ["DISCORD_CLIENT_ID"]
app.config["DISCORD_PUBLIC_KEY"] = os.environ["DISCORD_PUBLIC_KEY"]
app.config["DISCORD_CLIENT_SECRET"] = os.environ["DISCORD_CLIENT_SECRET"]


@discord.command()
def ping(ctx):
    "Respond with a friendly 'pong'!"
    return "Pong!"


discord.set_route("/interactions")


discord.update_commands(guild_id=os.environ["TESTING_GUILD"])


if __name__ == '__main__':
    app.run()
Expose your server to the Internet
In order for Discord to reach your bot, it has to be reachable on the public Internet. This step will depend on how you are running your code.
Testing
For testing on your local machine, you will need to proxy traffic from a public address to your computer. Services like ngrok can do this for you. Follow the guide to sign up and install, then use the command ./ngrok http 5000 to create a tunnel (assuming your Flask app is running on port 5000). The terminal should display a public URL (something like https://92832de0.ngrok.io). Make sure you use the HTTPS one, as Discord will not send interactions over HTTP. Leave ngrok running in the background while you run your bot.
Deployment
If you are using something like Heroku or Dokku, your public URL should be visible when you deploy the app, something like https://serene-caverns-82714.herokuapp.com/. If you are deploying directly to a cloud VPS with a public IP address, the steps are outlined in this DigitalOcean tutorial (it should be similar for most providers). You could also deploy to a local machine and use a service like No-IP to expose it to the Internet.
Note
If you’d like to deploy your bot in an environment with multiple workers, you might experience an issue where each worker tries to register your commands at the same time, causing you to be rate-limited. You should read the page on Pitfalls with Multiple Workers for information and advice relating to this issue.
Tell Discord where to send interactions
You need to provide Discord with your public URL so they can send you interactions. This setting is located in the “General Information” section of the Developer Portal.
Note that the example uses the /interactions endpoint to receive interactions.
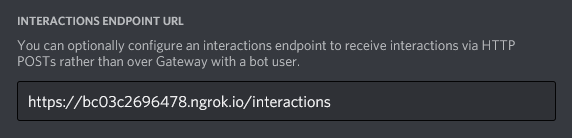
Click the “Save Changes” box at the bottom. Note that if your bot is not configured properly, the Developer Portal will not allow you to save the URL.
That’s all!
At this point, you should be able to use Slash Commands and receive a response from your bot. If you have any issues, you know where to put them!